
How to Find Fabric Grain
Finding the perfect fabric for your project can be tricky, especially when you’re not sure about the fabric grain. You’re not alone—many people struggle with understanding how fabric direction affects the final look and feel of their sewing projects.
Getting this right means your fabric will hang beautifully and sew smoothly, making your creations look professional every time.
To find fabric grain, you should first locate the selvage edge, the tightly woven border that tells you the fabric’s true direction. Then check the lengthwise grain, which runs parallel to the selvage, and the crosswise grain, which runs from selvage to selvage with a little more give.
The bias runs diagonally and stretches the most.
When you align your pattern correctly, your fabric will hang better and sew more smoothly, and there’s more to spot.
Key Takeaways
- Find the selvage edge first; it is the tightly woven border that shows the fabric’s true lengthwise direction.
- Align a ruler or pattern arrow parallel to the selvage to identify the lengthwise grain.
- Check crosswise grain by pulling gently from selvage to selvage. This direction usually has more give.
- Look for fabric threads and weave lines to verify grain, especially on plain-woven fabrics.
- Lay fabric flat without stretching, then adjust it so pattern pieces follow the lengthwise grain.
What Is Fabric Grain?

Fabric grain is the direction the threads run in woven fabric, and it matters because it affects how the material hangs, stretches, and sews. When you understand grain, you can work with the fabric instead of fighting it.
You’ll usually hear about lengthwise grain, crosswise grain, and bias, which describe how the yarns interlock and respond to handling. That fabric orientation shapes drape, stability, and ease of cutting, so it’s a basic part of good sewing.
As you learn to identify grain, you’ll notice how different textile properties change with direction. A piece cut on grain tends to stay straighter and behave predictably, while fabric cut off grain may twist or pull unevenly.
Knowing what grain means helps you choose layouts, place pattern pieces, and finish projects with cleaner results. It’s a simple concept, but it gives you control over how your fabric performs from first cut to final stitch.
Find the Selvage Edge First
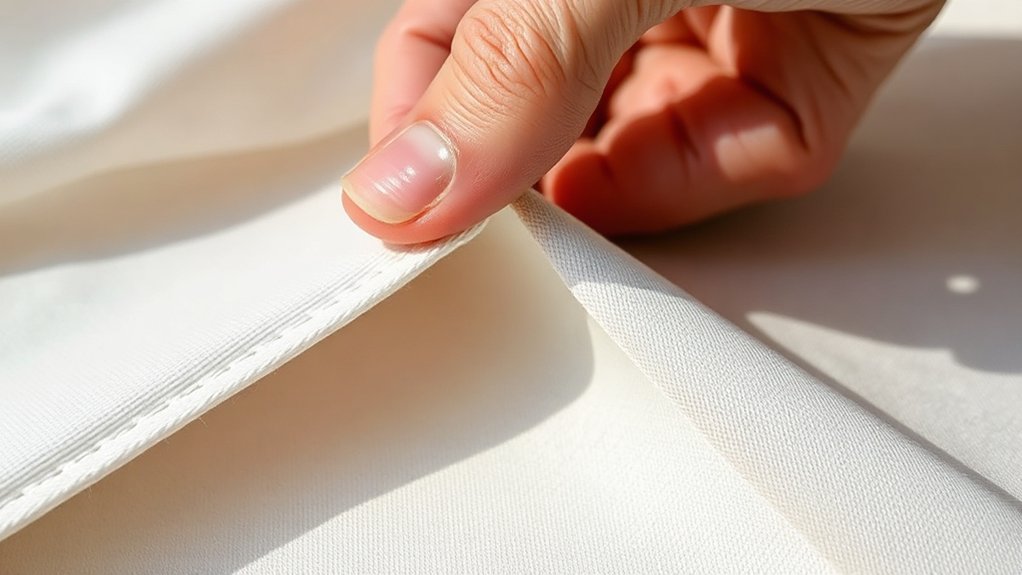
Start by locating the selvage edge, the tightly woven border that runs along both sides of most fabrics. You’ll usually spot it as a firm strip with tiny pinholes, printing, or a slightly different texture.
Use this edge for selvage identification before you do anything else, because it gives you a reliable reference point. Once you’ve found it, lay the fabric flat and smooth out wrinkles so you can judge fabric orientation accurately.
Use the selvage as your starting point, then smooth the fabric flat to judge orientation accurately.
The selvage runs parallel to the warp threads, so it helps you keep the piece aligned while you work. If the fabric has no obvious print or finish, gently stretch the edges and look for the less frayed side; that’s often the selvage.
Keep both selvage edges visible when possible, since they frame the fabric and make it easier to read grain direction later. This first step saves time and reduces guesswork.
Identify the Lengthwise Grain

To identify the lengthwise grain, you’ll want to look for the warp threads. These threads run parallel to the selvage edge. Think of the selvage as your guide because it shows the fabric’s true straight direction. Once you find this grain, it’s much easier to line up your pattern pieces correctly.
Warp Thread Direction
The warp threads run lengthwise along the fabric and usually parallel the selvage, making them the grain you’ll use as your main guide for cutting and layout. To spot the warp thread, gently stretch the cloth and notice how the lengthwise yarns resist more because of thread tension. That firmness helps you orient pattern pieces accurately.
- Hold the fabric flat and smooth it.
- Find the direction with the least give.
- Compare that line to the fabric’s strongest pull.
- Mark it before you cut.
When you place pieces on this grain, your project hangs better, keeps its shape, and sews more consistently. You’ll also reduce twisting, puckering, and uneven drape in finished garments.
Selvage Edge Reference
A fabric’s selvage gives you a reliable edge to trace when you’re identifying the lengthwise grain. Hold the cloth flat and follow that woven border; it runs parallel to the warp threads and shows the fabric’s strongest direction.
This selvage importance helps you cut garments that hang properly and resist stretching. For quick selvage identification, compare the edge with the crosswise direction and notice how little it gives.
| Check | What You See | Meaning |
|---|---|---|
| Edge | Tight woven strip | Selvage |
| Pull | Minimal stretch | Lengthwise grain |
| Alignment | Parallel path | Correct reference |
| Texture | Firm finish | Stable edge |
| Use | Pattern placement | Accurate cutting |
Identify the Crosswise Grain
To find the crosswise grain, look for the line that runs from selvedge to selvedge across the fabric. You can also test how the fabric stretches when you pull it perpendicular to the lengthwise grain. This helps you figure out which direction has the most give.
Spot Selvedge To Selvedge
Sometimes the easiest way to find the crosswise grain is to look for the selvedges, the finished edges that run along each side of the fabric. You can use their selvedge characteristics to spot the crosswise direction fast, especially on woven cloth.
Watch for the tighter, cleaner edge and the tiny holes or colored threads that often mark it.
- Lay the fabric flat.
- Find both finished edges.
- Trace straight across from one selvedge to the other.
- Use these spotting techniques to confirm you’re following the crosswise grain, not the lengthwise grain.
Once you’ve found the selvedges, you’ll know the direction that runs from edge to edge across the fabric.
Measure Perpendicular Stretch
Another reliable way to identify the crosswise grain is to test how the fabric stretches. Hold the cloth flat, then make a perpendicular measurement from the selvedge toward the cut edge.
Gently pull across the width and notice how much give you feel. In stretch testing, the crosswise grain usually offers a little flexibility, while the lengthwise grain stays firmer and resists movement.
Keep your pull light so you don’t distort the fabric or misread the result. If the cloth stretches more from side to side than along the grain, you’ve likely found the crosswise direction.
Mark it with chalk or a pin so you can keep your layout straight before cutting or sewing.
Check the Bias for Stretch
Hold the fabric at a diagonal, this is the bias, and gently pull to see how much it gives. This quick stretch testing reveals bias characteristics that help you judge drape and control. Because the diagonal follows neither lengthwise nor crosswise threads, it often stretches more than the straight grain.
Hold the fabric on the bias and gently stretch it to reveal drape, give, and control.
- Pull the edge lightly with both hands.
- Notice whether it springs back or stays elongated.
- Compare the stretch on opposite diagonals.
- Feel for wobble, distortion, or soft give.
If the fabric stretches a lot, handle it carefully when cutting and sewing. If it barely moves, it may behave more like a stable weave. Keep your pull gentle; you want to observe, not distort. As you test, watch how the fabric shifts in your hands so you can predict how it’ll behave on the body. This simple check helps you understand the fabric before you move on.
Use Grainlines on Patterns
When you use a pattern, you’ll notice grainline arrows on it. These arrows show you how to line the pattern up on your fabric. You’ll want to place each arrow so it runs parallel to the fabric’s lengthwise grain. This way, your piece will hang and fit just right.
If you take the time to match the grainline carefully, you’ll end up with better shape, drape, and stability in your finished project. It really makes a difference!
Reading Grainline Arrows
Look for the grainline arrow on your pattern pieces, because it tells you exactly how to place each piece on the fabric. You’ll see a long line with arrows at both ends, and that line shows the pattern’s direction on the cloth. Understanding this helps you respect grainline importance and keep fabric alignment accurate, so your garment hangs smoothly.
- Place the arrow parallel to the fabric’s lengthwise grain.
- Keep the arrow straight, not tilted.
- Check that the pattern piece follows the arrow from top to bottom.
- Pin or weight the piece before cutting.
When you read grainline arrows correctly, you reduce twisting, stretching, and uneven drape. That small step makes your cutting cleaner and your sewing results more reliable.
Matching Grainline To Fabric
Start by matching the grainline arrow on your pattern to the fabric’s straight grain, since that’s what keeps your pieces hanging correctly. Lay the pattern piece on the fabric, then smooth it until the arrow runs parallel to the selvedge.
Check grainline alignment at both ends of the arrow, not just the center, because small shifts can cause fit issues. If the fabric has a print, stripes, or nap, make sure the design still sits square and true.
Pin or weigh the piece in place, then double-check before cutting. This step reduces fabric distortion and helps your garment drape evenly. When you take time here, you protect shape, improve comfort, and avoid costly mistakes later.
Match Grain When Cutting Fabric
Before you make the first cut, match the grain on every pattern piece so the fabric hangs and stretches the way it should. You’ll get cleaner results when you pause to check grain alignment, smooth the cloth, and line up each piece with the marked grainline. Good cutting techniques start before the blade moves.
Pause to match every grainline before cutting; it’s the small step that gives fabric its best drape.
- Lay the fabric flat without pulling it.
- Pin or weight the pattern so it won’t shift.
- Compare the fold, selvage, and grainline again.
- Cut slowly, keeping scissors or the rotary cutter steady.
When you keep the grain true, seams sit better, hems look balanced, and the finished garment drapes more evenly. If a piece drifts off grain, recut it now instead of hoping it’ll work later. That small correction saves you from twisted seams, uneven hang, and wasted fabric.
Find Grain in Wovens and Knits
In woven fabric, the grain runs lengthwise along the selvage and crosswise from edge to edge, so you can find it by tugging gently and watching how the threads line up. You’ll see the straight grain feel firmer and stretch less than the cross grain.
Check the fabric orientation by looking for parallel yarns, then trim a small corner and pull it lightly to see which direction resists. On knits, ignore selvages and look for the rows of loops; the lengthwise grain follows the columns of stitches, while the crosswise direction stretches more.
Use the textile characteristics of each fabric to guide you: wovens hold shape, and knits recover and curl differently. Lay the piece flat, smooth it with your hands, and compare both directions before you cut. If the fabric seems uneven, trust the dominant line of threads or loops you can see and feel.
Fix Off-Grain Fabric
If your fabric pulls off grain, you can often coax it back into alignment before you cut. Start by smoothing it on a large table and gently tugging along the crosswise and lengthwise threads. Use steam or a light press to relax fabric distortion, but don’t stretch the cloth.
For stubborn panels, pin the selvages to a padded board, then mist and square the edges.
- Check the grainline with a ruler or tape measure.
- Shift the fabric until the edges look even.
- Press from the wrong side with short bursts of steam.
- Let it cool flat so the correction sets.
If the fabric still drifts, repeat the process in small sections. You’re aiming for grain correction, not force. Once the weave lies true, trim the edge and recut your pattern pieces. This small reset helps your project hang better and keeps seams from twisting later.
Common Fabric Grain Mistakes to Avoid
Even careful sewists can make grainline mistakes, and the most common one is trusting the edge instead of checking the weave. You might assume the selvedge is always straight, but factory tension can distort it and lead to fabric misalignment.
Instead, pull a thread or fold the fabric so the crosswise yarns match evenly. Don’t skip this step on prints either; a bold pattern can hide skew.
Pull a thread or align the weave carefully; even bold prints can conceal fabric skew.
Another mistake is ignoring stretch direction. If you cut a pattern piece off grain, it may twist after washing or hang poorly.
You should also avoid spreading fabric on a warped cutting surface since that invites cutting errors before you even start. Check both ends of the yardage, smooth wrinkles, and pin or weigh the cloth before you cut.
When you slow down and verify the weave, you protect the fit, drape, and finish of every project.
Frequently Asked Questions
How Do I Find Grain on Printed Fabric?
You can find grain on printed fabric by using the print as a guide, but don’t rely on it alone. First, check the selvage and measure parallel to it for grain orientation.
Then, pull or fold the fabric to see which direction stretches least. If the print runs off-square, ignore it and trust the weave.
Mark the true grain before cutting so your pieces hang correctly and stay stable.
Can Fabric Grain Change After Washing?
Yes, fabric grain can shift after washing, like a compass nudged by wind. You’ll notice some fabrics twist, shrink, or relax, and those washing effects can alter fabric characteristics you relied on before.
If you handle the fabric gently, reshape it while damp, and dry it carefully, you can limit that change. Still, you shouldn’t expect every cloth to stay perfectly true to its original grain after repeated laundering.
Does Fabric Grain Matter for Upholstery Projects?
Yes, fabric grain matters for upholstery projects because you need proper fabric alignment for a polished finish and better upholstery durability. When you cut and stretch fabric on the correct grain, you reduce twisting, sagging, and uneven wear.
You’ll also make seams sit straighter and patterns look cleaner. If you ignore grain, your piece can look sloppy and wear out faster, especially on seats, arms, and cushions.
How Do I Check Grain Without a Selvage Edge?
You can check grain by gently stretching the fabric in both directions; the grain that stretches least usually runs straight with the warp or weft. Next, fold and compare the hang to spot the bias direction, which feels more fluid and slants differently.
You can also tug a thread if the weave allows. Watch how the fabric drape behaves, since it often reveals the straight grain more clearly than edges do.
Can I Use a Ruler to Measure Fabric Grain?
Yes, you can use a ruler to measure fabric grain, and it’ll help you stay precise. Like lining up train tracks before a long ride, you want straight, steady guidance.
You’ll measure along the length and width, then compare thread direction with your measuring techniques. If the fabric shifts, smooth it first.
A ruler won’t reveal everything, but it’ll help you spot fabric grain accurately and cut cleaner pieces.
Conclusion
You can find fabric grain by checking the selvage, tracing the lengthwise threads, and spotting the crosswise threads. You can cut with confidence by matching grain lines, and you can sew with better drape by avoiding the bias unless you need stretch.
You can also correct off-grain fabric before you start. When you understand grain, you protect fit, improve finish, and make every project easier. Knowing how to find fabric grain is key to achieving these results.